
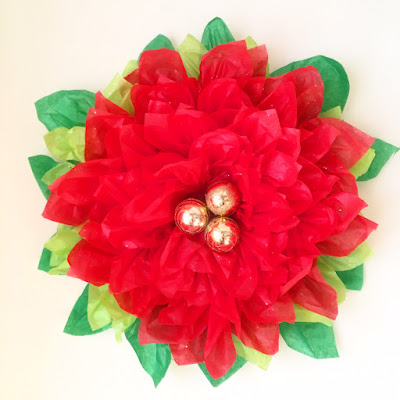
Poinsettia is one of most beautiful flowers here in New England during Christmas.I am sometimes surprised at its vibrancy and the colors they come in..they are sometime spray painted with silver and looks so beautiful adorning the altars of the churches here during Christmas.I was so inspired by this flower that I wanted to try one out but it took a turn and I landed with a new twist to a little old classic mesh wreath technique that is now very popular in the USA.


There was once a poor Mexican girl called Pepita who had no present to give the the baby Jesus at the Christmas Eve Services. As Pepita walked to the chapel, sadly, her cousin Pedro tried to cheer her up.'Pepita', he said "I'm sure that even the smallest gift, given by someone who loves him will make Jesus Happy."
Pepita didn't know what she could give, so she picked a small handful of weeds from the roadside and made them into a a small bouquet. She felt embarrassed because she could only give this small present to Jesus. As she walked through the chapel to the altar, she remembered what Pedro had said. She began to feel better, knelt down and put the bouquet at the bottom of the nativity scene. Suddenly, the bouquet of weeds burst into bright red flowers, and everyone who saw them were sure they had seen a miracle.
From that day on, the bright red flowers were known as the 'Flores de Noche Buena', or 'Flowers of the Holy Night'. The shape of the poinsettia flower and leaves are sometimes thought as a symbol of the Star of Bethlehem which led the Wise Men to Jesus. The red colored leaves symbolize the blood of Christ. The white leaves represent his purity. Beautiful story!
To make this pointsettia you need:
Step 1:
A 12 inch wreath form - from Michaels
A set of tissue paper more than 20 by 20 inches wide in 2 greens and red.I found one with glitter on them this time - any thing is good!
A florist wire - you can use chenile stems too! I didnt have them on hand..

Step 2.
Just like the mesh wreath that we make cut pieces of 10 inches of wire and tie onto each division of the wreath ring one on the outer ring and one set in the second inner ring.
Now take longer pieces of the wire and make cross wires on the partions so you should get a pattern like below.I hope you can see where I have tied it.I have just made my first one so I guess there will be more improvisations soon..

Step 3.
Cut 10 by 10 inches of the greens and red - if you have a 20 by 20 I divided each into 4.The darker green I used a bit larger one as I wanted it to peek out more at the ends.

Step 4
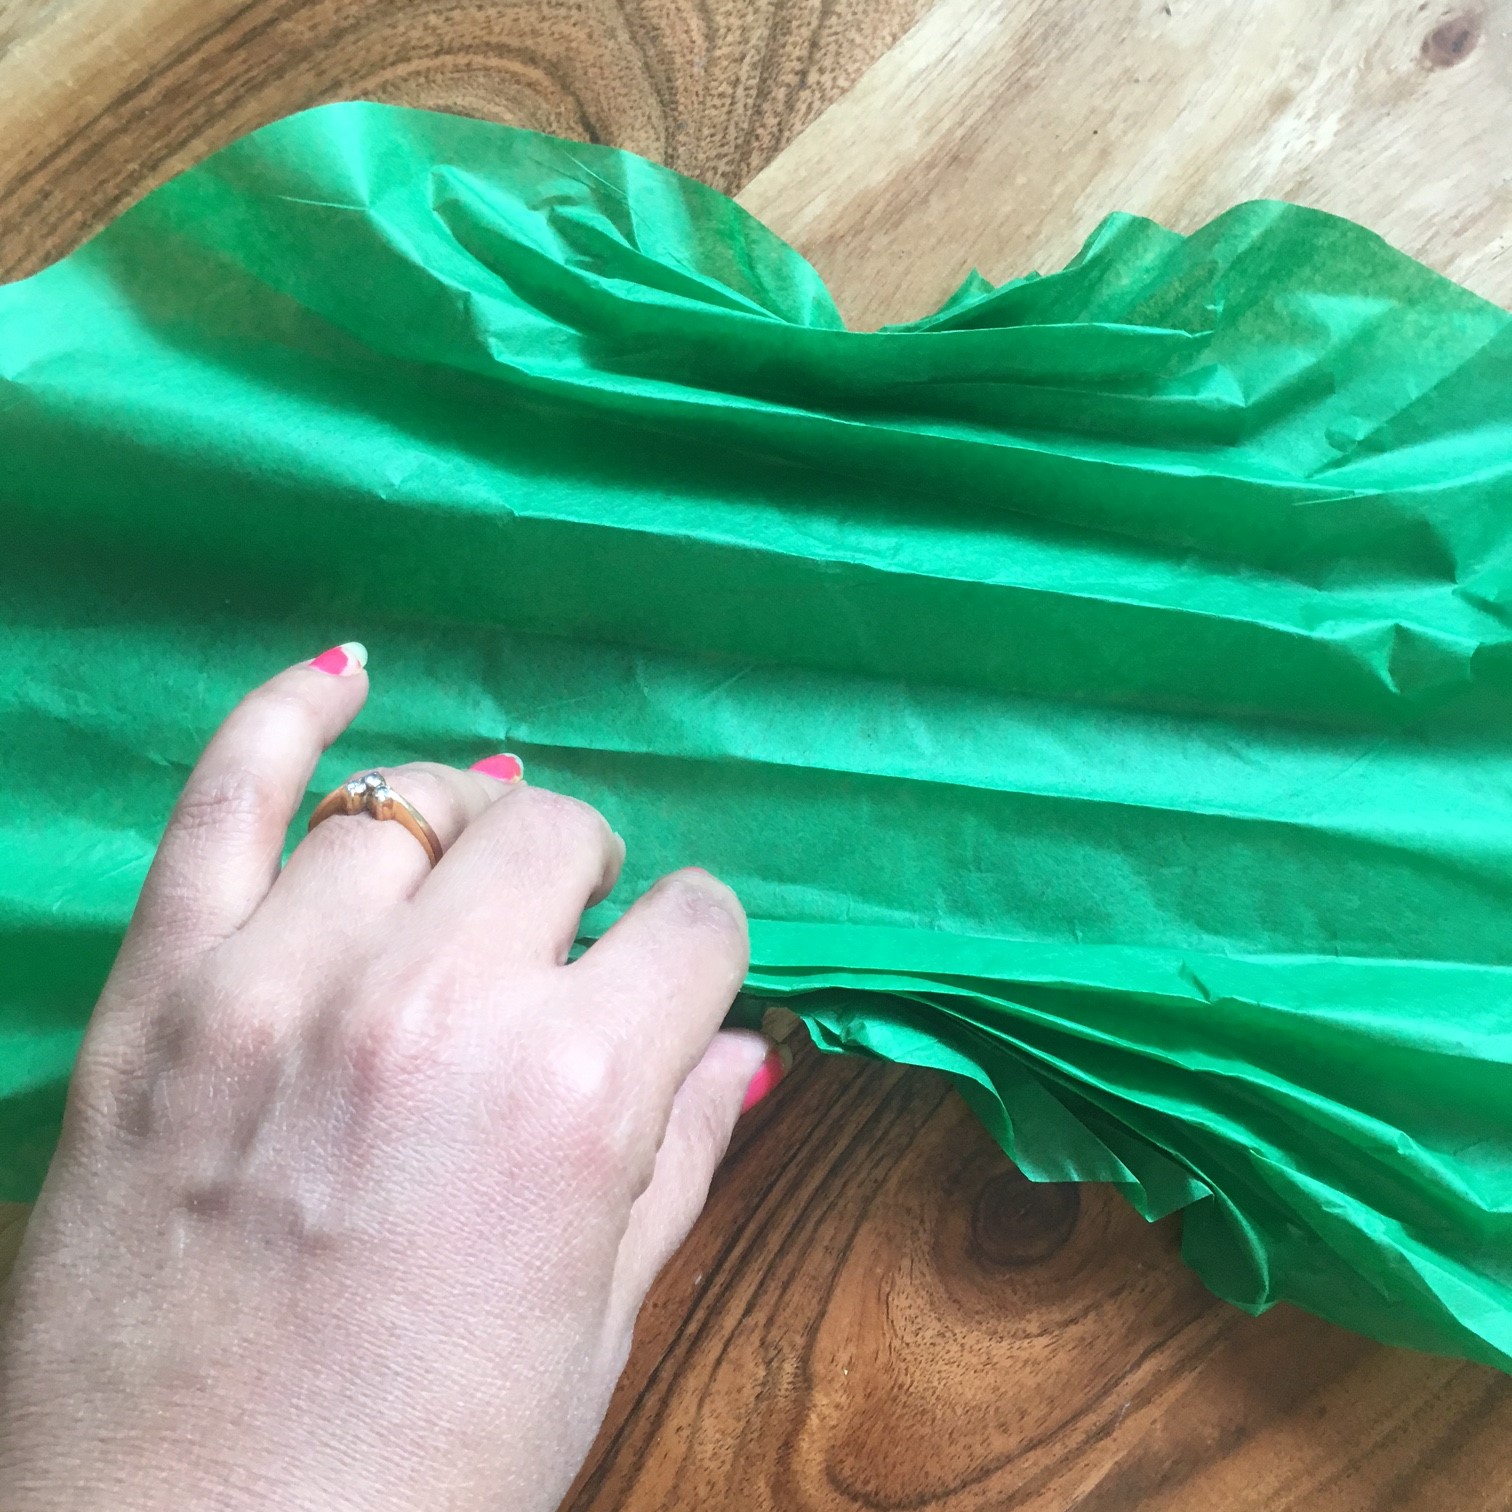
This was the tricky part for me initially I couldn't figure out how to keep the tissue paper looking full so my origami ideas came into play - how I love origami now!

I pleated the square on the diagonal like in the picture it can be rough pleats and catch the center and bring both end up like an origami leaf!


Step 4.
Add a second leaf using the same method and place one on top and tie.Snip wire ends.

Step 5
Attach these leave to the wreath form using the wires on the wreath form itsefl bringing then wires down the middle to adhere to ring.Repeat till whole ring is formed.

Step 6.
Add a second set of lighter green leaves at the outer ring itself forming a ful ring.(I couldnt get a picture of that..)

Step7
Form petals using the red paper adding to the outer ring and then moving to the innner ring now..

Step 8.
Once you have attached petals in the inner ring form petals and add to the crosswires till you reach the center..
Step9
Wire the baubles onto stem wire and tie in the center..
Here is a video of the beautiful pointsettia! So easy and a bang for the bucks!!Create them for your parties and sent me pictures!!


Do enter my giveaway below to get a free paper flower kit!
Do you like this DIY please do help us by sharing or pinning this project,Follow my pinterest boards and on my instagram for videos and more sneak peaks..Using the affialiate links below to buy any gifts would be much appreciated!
Happy Crafting! Maria Noble
a Rafflecopter giveaway Here are products I like do use the affiliate links below -it would support the DIY section of this blog!


 Posts
Posts


