To create this tree I used the paper again from my origami flowers kits (you can buy this kit from here using all those gift cards you got over the Christmas)which has been translated into many languages with new covers which I love!
I chose green and red for some and some brightly colored pattern for the other to create these cute and colorful trees!
Step1.
1.You would need a 2 pages from the kit or any paper on hand,here I have chosen a green chequered paper and a bight red paper.The paper from the kit are double sided which makes it all the more fun to craft!
2.A scissors
Step 2
Fold the lovely square paper into half,unfold and fold again in the opposite way,now fold on the diagonals.
Now create the square base (more steps in the kit..) as in the second picture
Step 3
Bring both side of the square to create a triangle in first shape below.Flip over and fold sides to middle to form triangle kite shape...
Step 4
Open the side flap and tuck this flap inside the shape (called reverse fold) to result in the shape shown further down in step 5
Step 5
Step 6
Open the other flap and tuck that inside.Flip the side do similarily with the flaps to form the kite shape below...
Step 7
Use your scissors to snip the bottom ends below to get a tree shaped triangle..
Step 8
Using scissors make 4 cuts in the sides of the triangle on each side like below
Step 9
Fold the cut ends to form ends of the tree!
Step 10
Flip over the flap and repeat folds to create the tree
Usually the tree sits by itself but I thought it would looks even better with a truck after fiddling around I figured out an easy pleated trunk!
Step 11
To make this use the red (I wanted to stick to xmas theme but you could use brown..)
I fold the square into half like below
Step 12
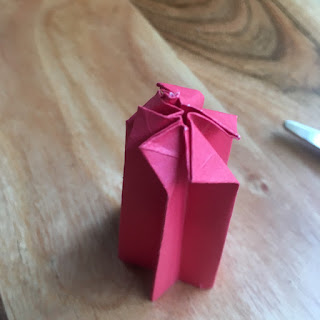
Pleat the paper by making repeated folds like an accordion fold.
Keep folding keeping pleats equal and small..
Open one side and tuck the other end into the fold to make an even no of folds..
Step 13
Fold the corners down to meet all the fold at the center to crease well each fold to form shape below..
Insert shape into the bottom of the tree like below.
Cut a small star (draw) and stick on top..
Do you like this DIY please do help us by sharing or pinning this project,Follow my pinterest boards and on my instagram for videos and more sneak peaks..Using the affialiate links below to buy any gifts would be much appreciated!
Happy Crafting! Maria Noble
Be sure to enter the giveaway below for a fnatastic paper kit! a Rafflecopter giveaway
Here are products I like do use the affiliate links below -it would support the DIY section of this blog!


1 comment:
Beautiful art! Your ideas are so creative. Thanks for sharing.
Post a Comment